In the first article, we gave an overview of Hailo’s power measurement solution.
Series: Edge AI Power Benchmarking
In this second article, we attempt to reproduce the power measurements with an alternate strategy.
The motivation is to determine a reliable power measurement solution, that we can apply to M.2 AI accelerators from other vendors, which do not have on-board power measurement functionality.
Power Measurement solutions
There are several companies offering power measurement solutions, at different price ranges.
Most use the same technique as Hailo : measuring the voltage/current drop across a shunt resistor. In order to add this circuit into existing systems, the solutions offer adapters with power insertion capabilities.
Quarch
The Quarch solution is based on a Power Analysis Module (PAM), which connects to various fixtures for PCIe and/or M.2.
In addition to power measurement, this solution comes with additional features, such as power generation, and fault injection. All this comes at a premium:
- Power Analysis Module (PAM) : ~ 1,500-2,500 pounds
- PCIe Slot M.2 Power Injection Fixture : ~ 300-600 pounds
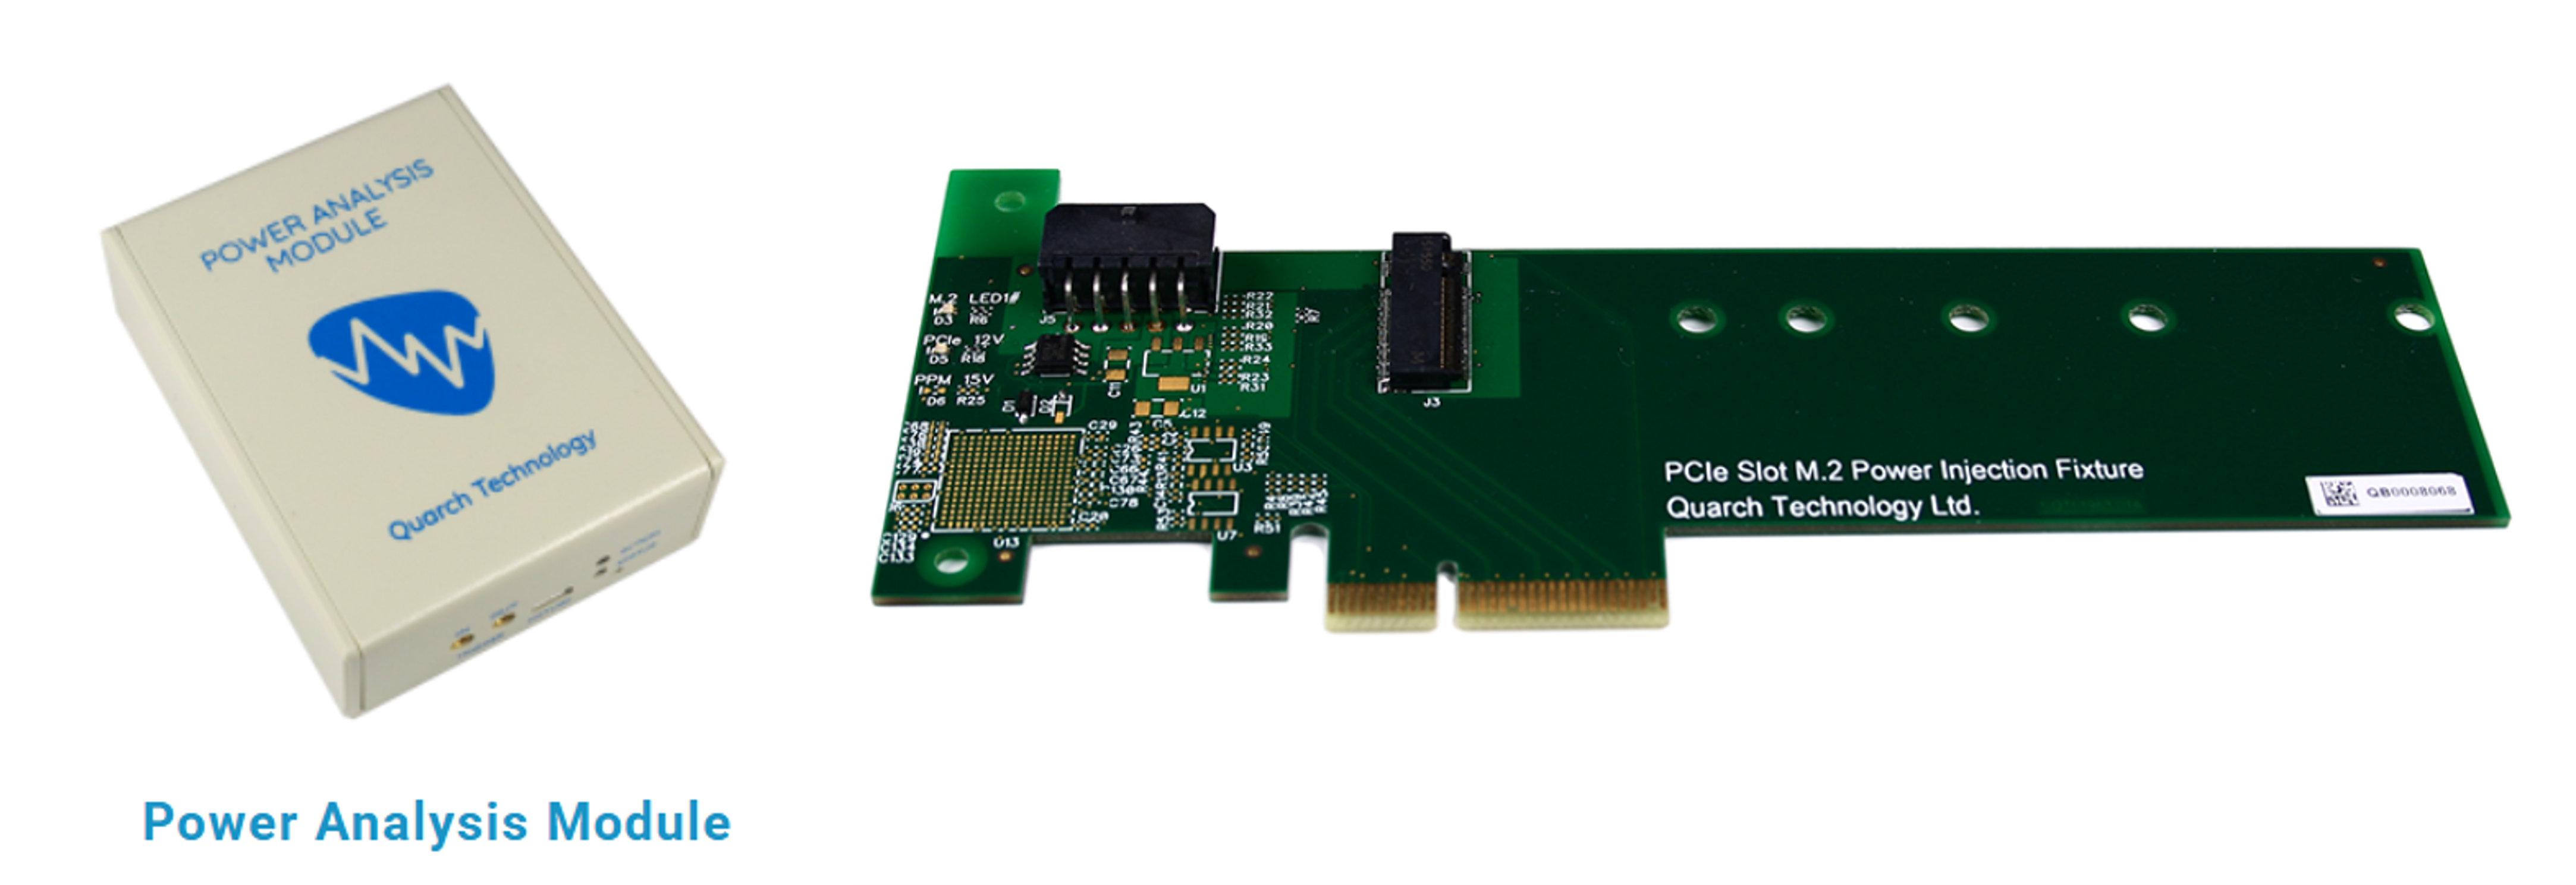
This solution was out of my budget, but it was relevant to mention just the same.
ElmorLabs
ElmorLabs provides a solution that is compatible with standard ATX power supplies.
They provide power measurement boards that are placed in line with the ATX24, EPS, and PCIE power cables, and also provide PCIe power insertion modules to measure the power on PCIe slots.
Although the ElmorLabs does not address M.2 slots, their PCIe power insertion modules can be used with PCIe to M.2 adapters for our use case.
- ElmorLabs PMD2 : $99 USD
- PMD PCIe 4.0 Power Measurement Adapter : $30 USD
- PCIe to M.2 adapter (generic)
This solution is available at a modest budget, so I gave it a try.
Custom INA circuit
Creating a custom circuit with a INA device, similar to Hailo, would seem to be the best solution.
There are several vendors selling INA-based circuits, that are meant to be integrated into a larger system:
- Adafruit INA228 I2C Power Monitor - $14 USD
- Adafruit INA23x DC Current Voltage Power Monitor $ 10 USD
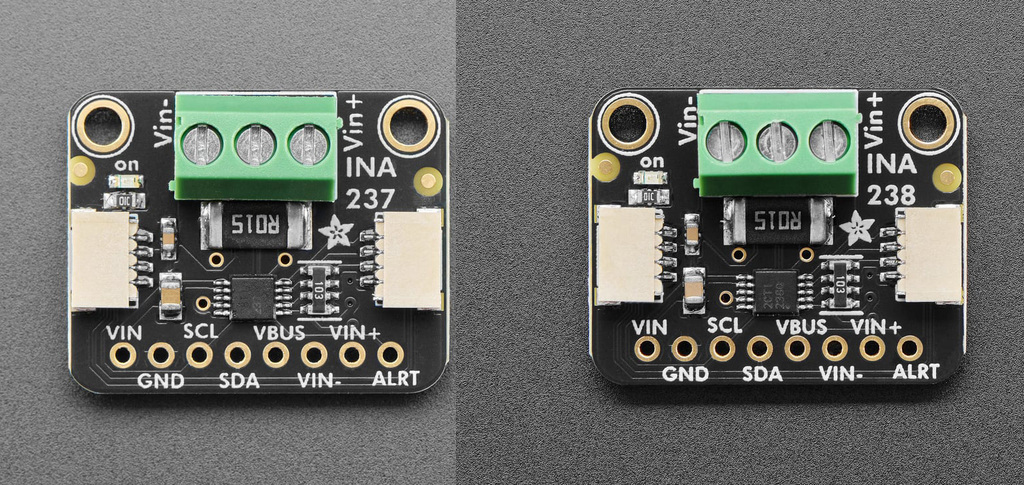
These modules would be the most cost effective, but are only part of a solution, and would require additional investigation and planning.
Assembling the System
For my first attempt, I went with the ElmorLabs solution.
This involved several steps, which I have illustrated in the following figure:

First, the ElmorLabs PMD2 needs to be connected in series between the PC’s PSU and motherboard.
Second, the ElmorLabs PMD PCIe Power Measurement Adapter needs to be connected in series between the PC’s PCIe slot, and our M.2 AI accelerator module.
Connecting the PMD2 to our ATX power supply
This step was rather involved, and required cutting all the convenient tie wraps that kept the cabling inside my ATX PC tidy.
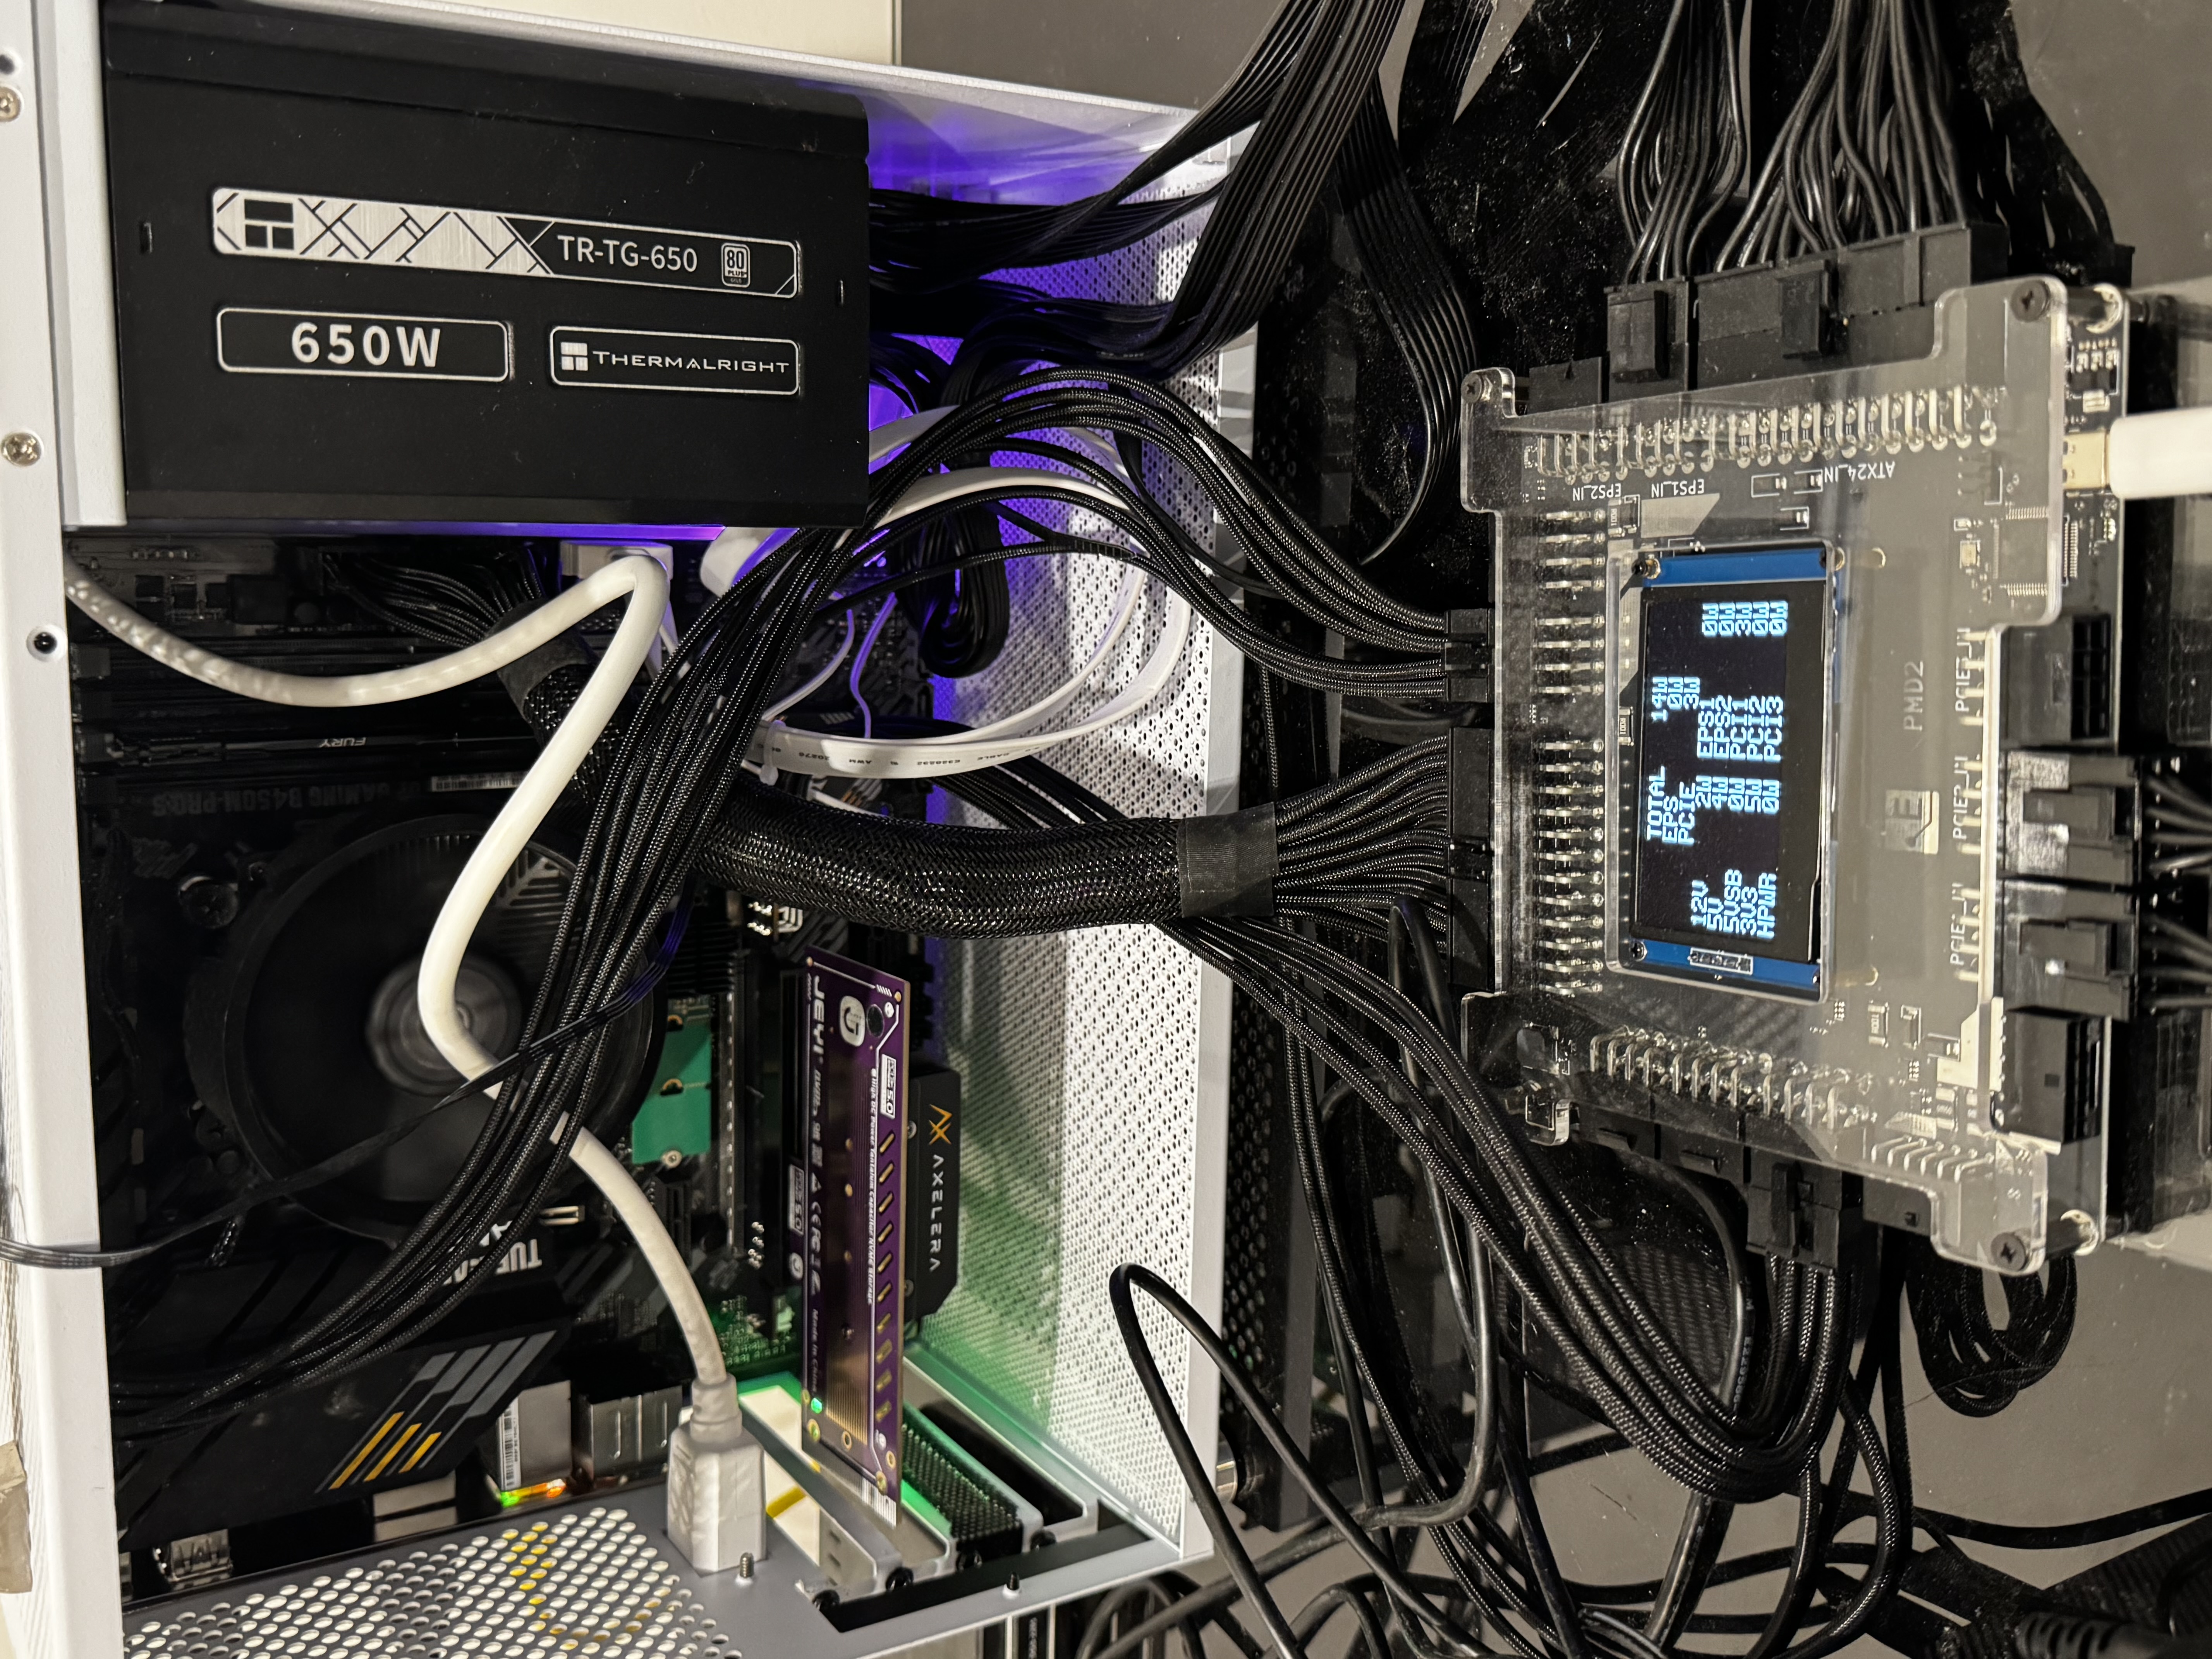
Connecting our M.2 module to the PCIe Power Insertion Adapter
The ElmorLabs PMD PCIe Power Measurement Adapter allows for power insertion from an external 12V source (provided by standard PCIE cables from a ATX power supply).
Each of the following voltage rails can be sourced from the parent SLOT, or the external (EXT) 12V supply:
- 12V : sourced directly from the SLOT or EXT 12V
- 3V3 / 3V3(AUX) : sourced directly from the SLOT or via on-board 3.3V regulator (2A) driven by the EXT 12V
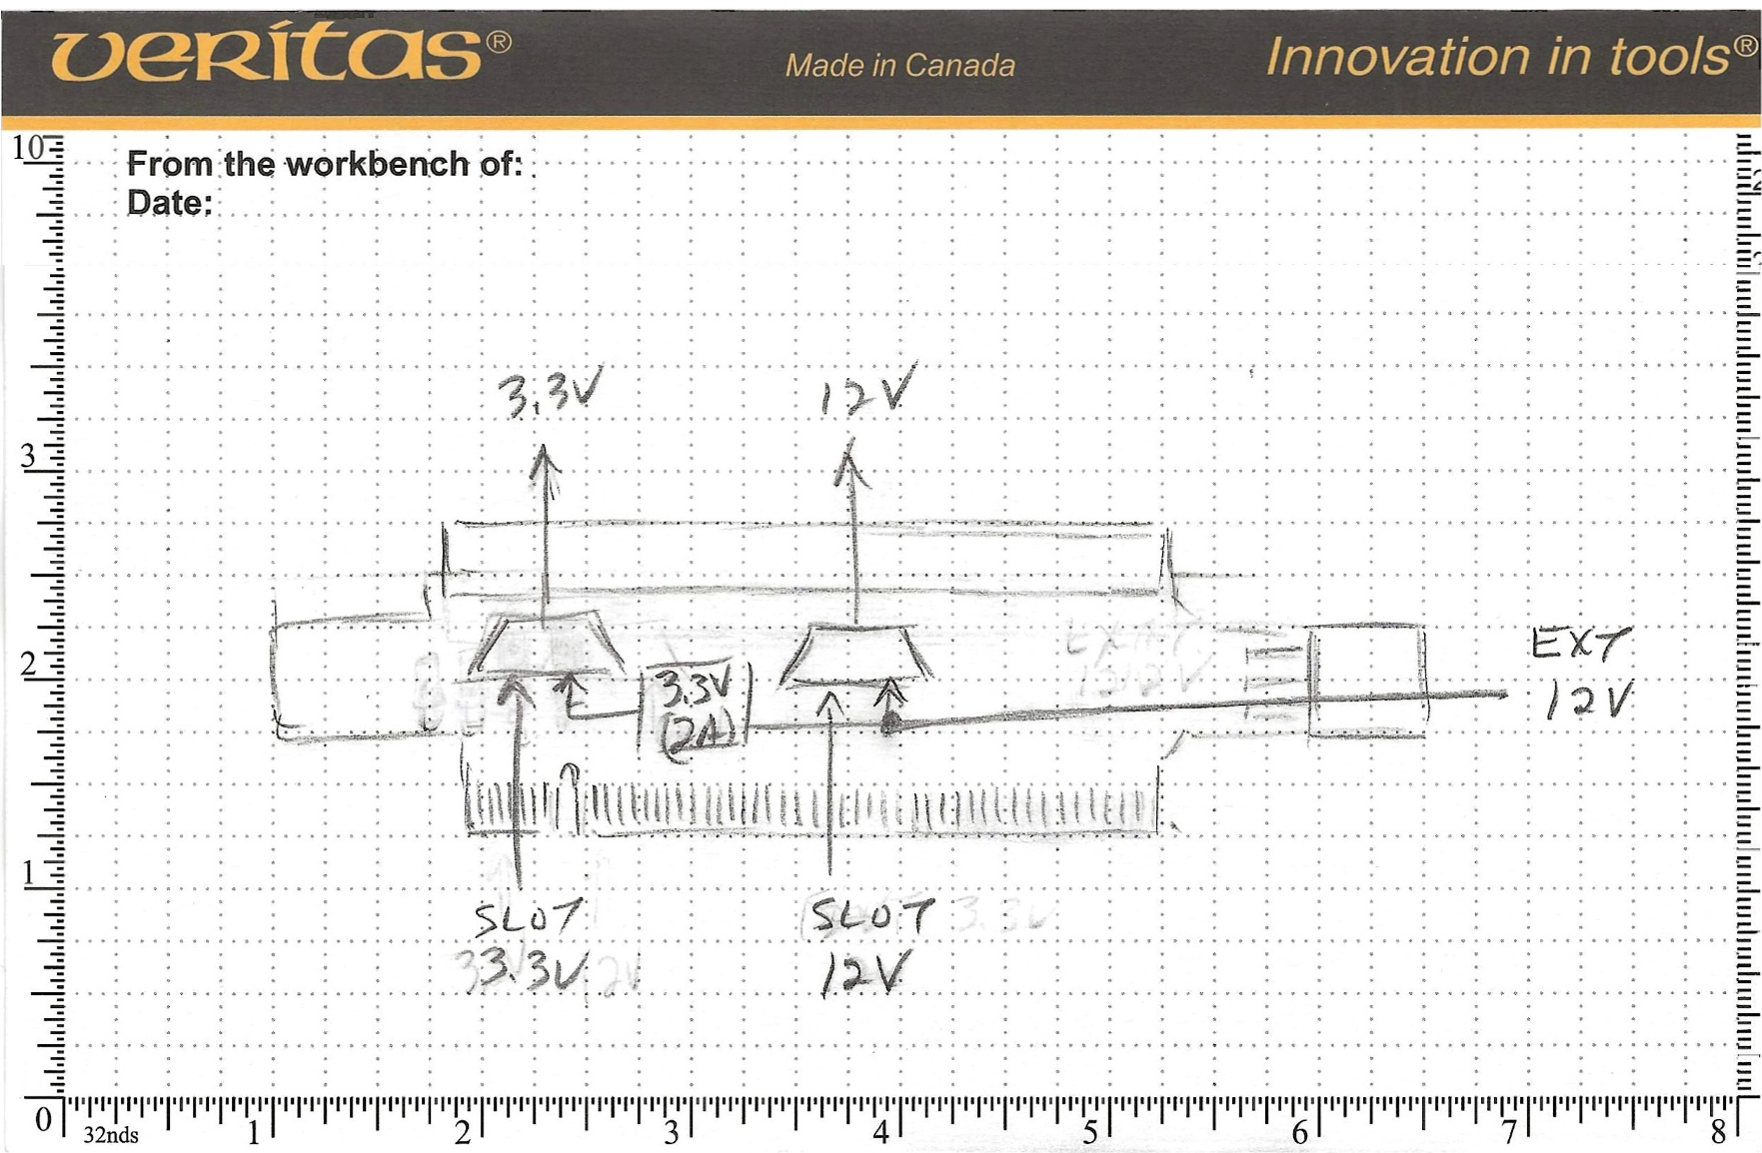
As we will see in the next sections, this particular on-board 3.3V regulator can sometimes be insufficient due to its approximate 2A limit (not documented, this is my best guess).
- Hailo-8 : 3.3V(2A) was sufficient for operation
- Higher-power M.2 modules: 3.3V(2A) may be insufficient — I observed at least one module that failed to enumerate when fed from the PMD’s on-board 3.3V regulator
Choosing the right PCIe to M.2 adapter
The simpler PCIe to M.2 adapter modules that you will find, simply route the PCIe’s 3V3 rail to the M.2 socket.
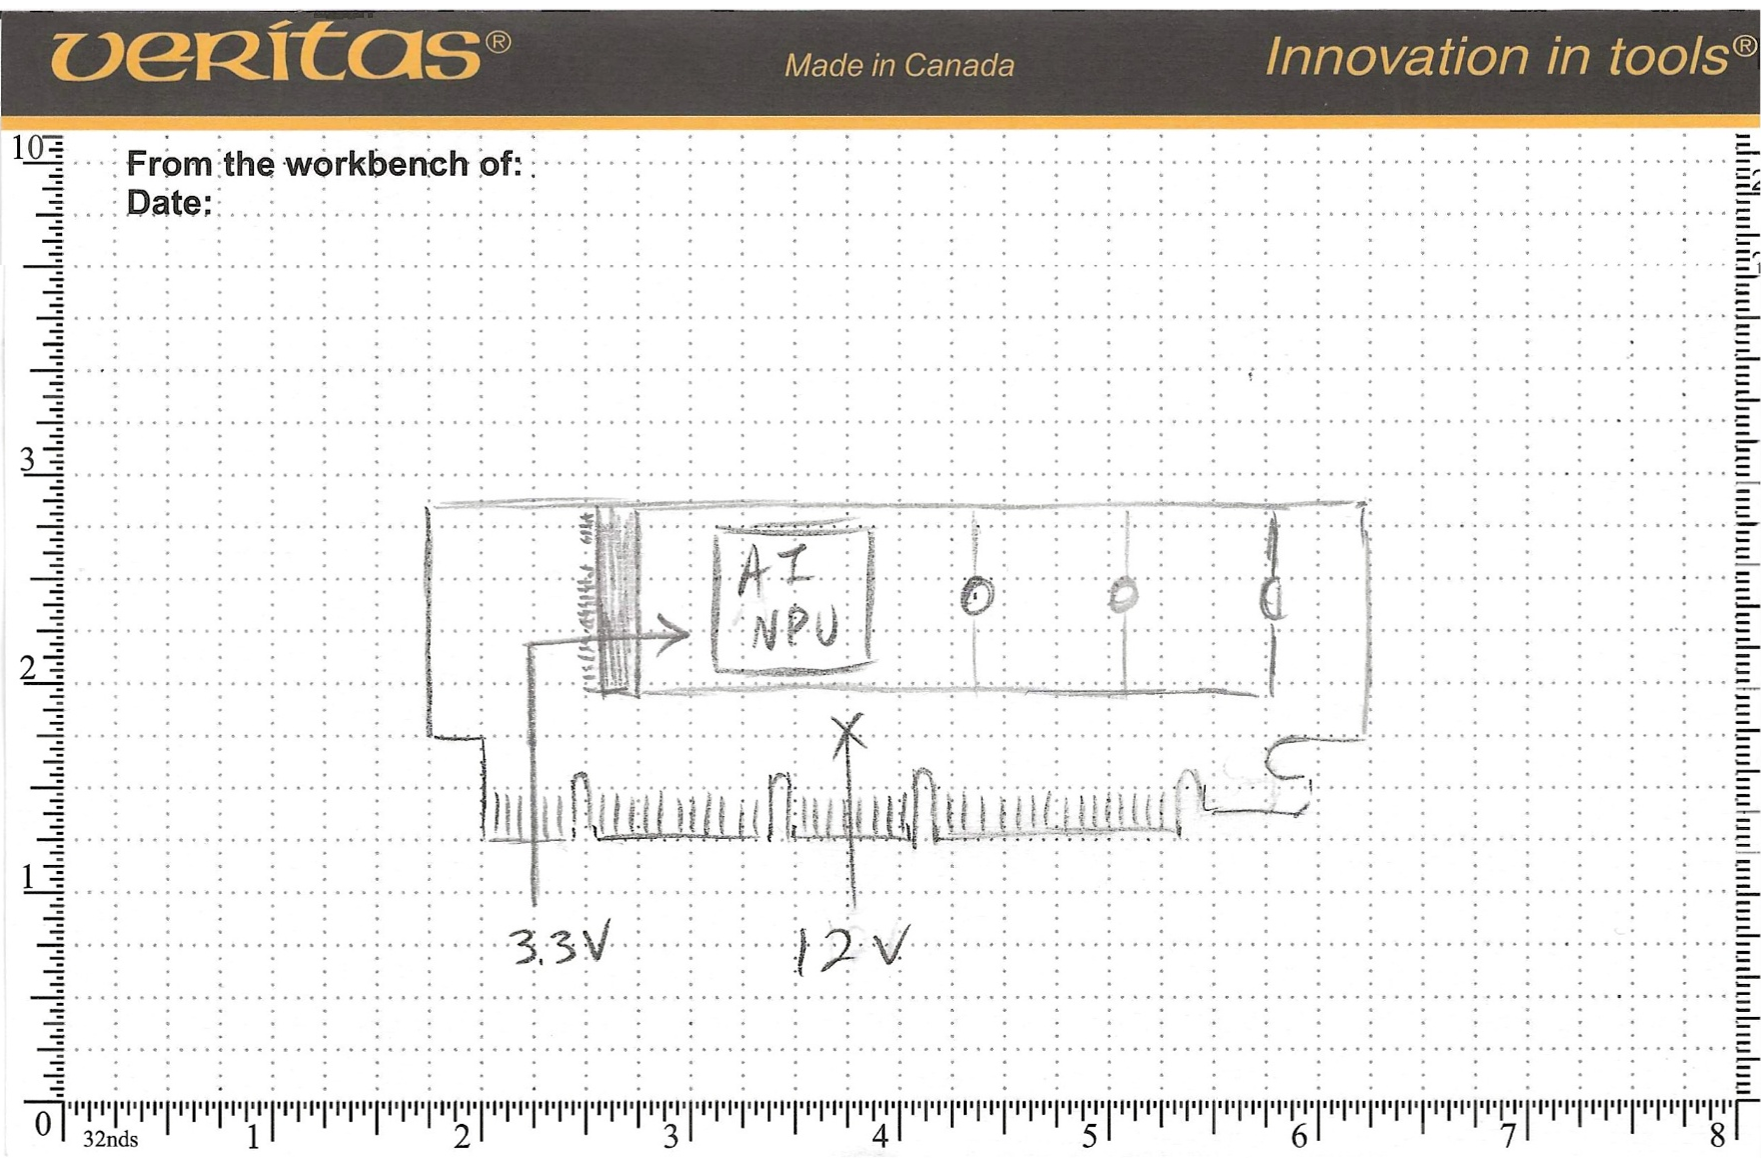
The more complex and expensive PCIe to M.2 adapter modules will re-generate the 3V3 rail from the main 12V.
This one from JEYI generates a 3.3V supply capable of 6A
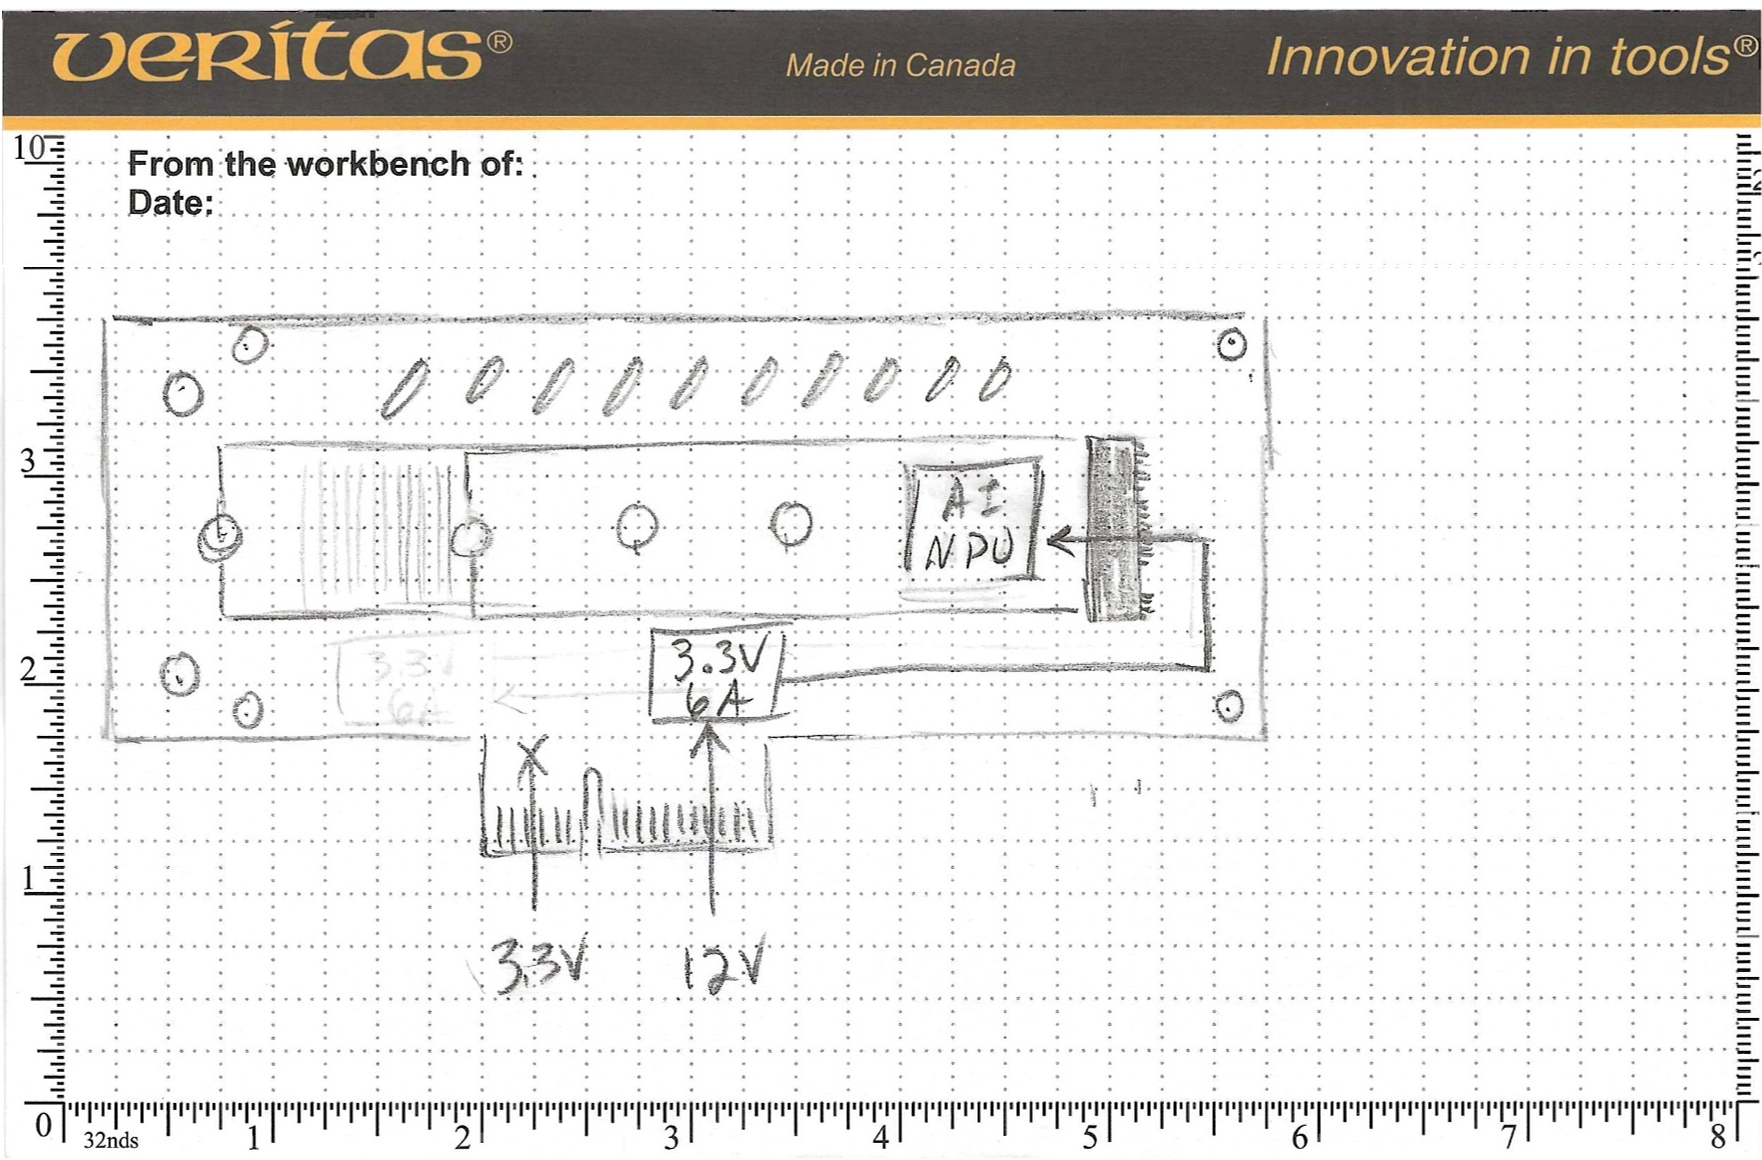
Depending on which M.2 AI accelerator is being measured, two possible strategies are possible, both involving on-board 3.3V regulators.
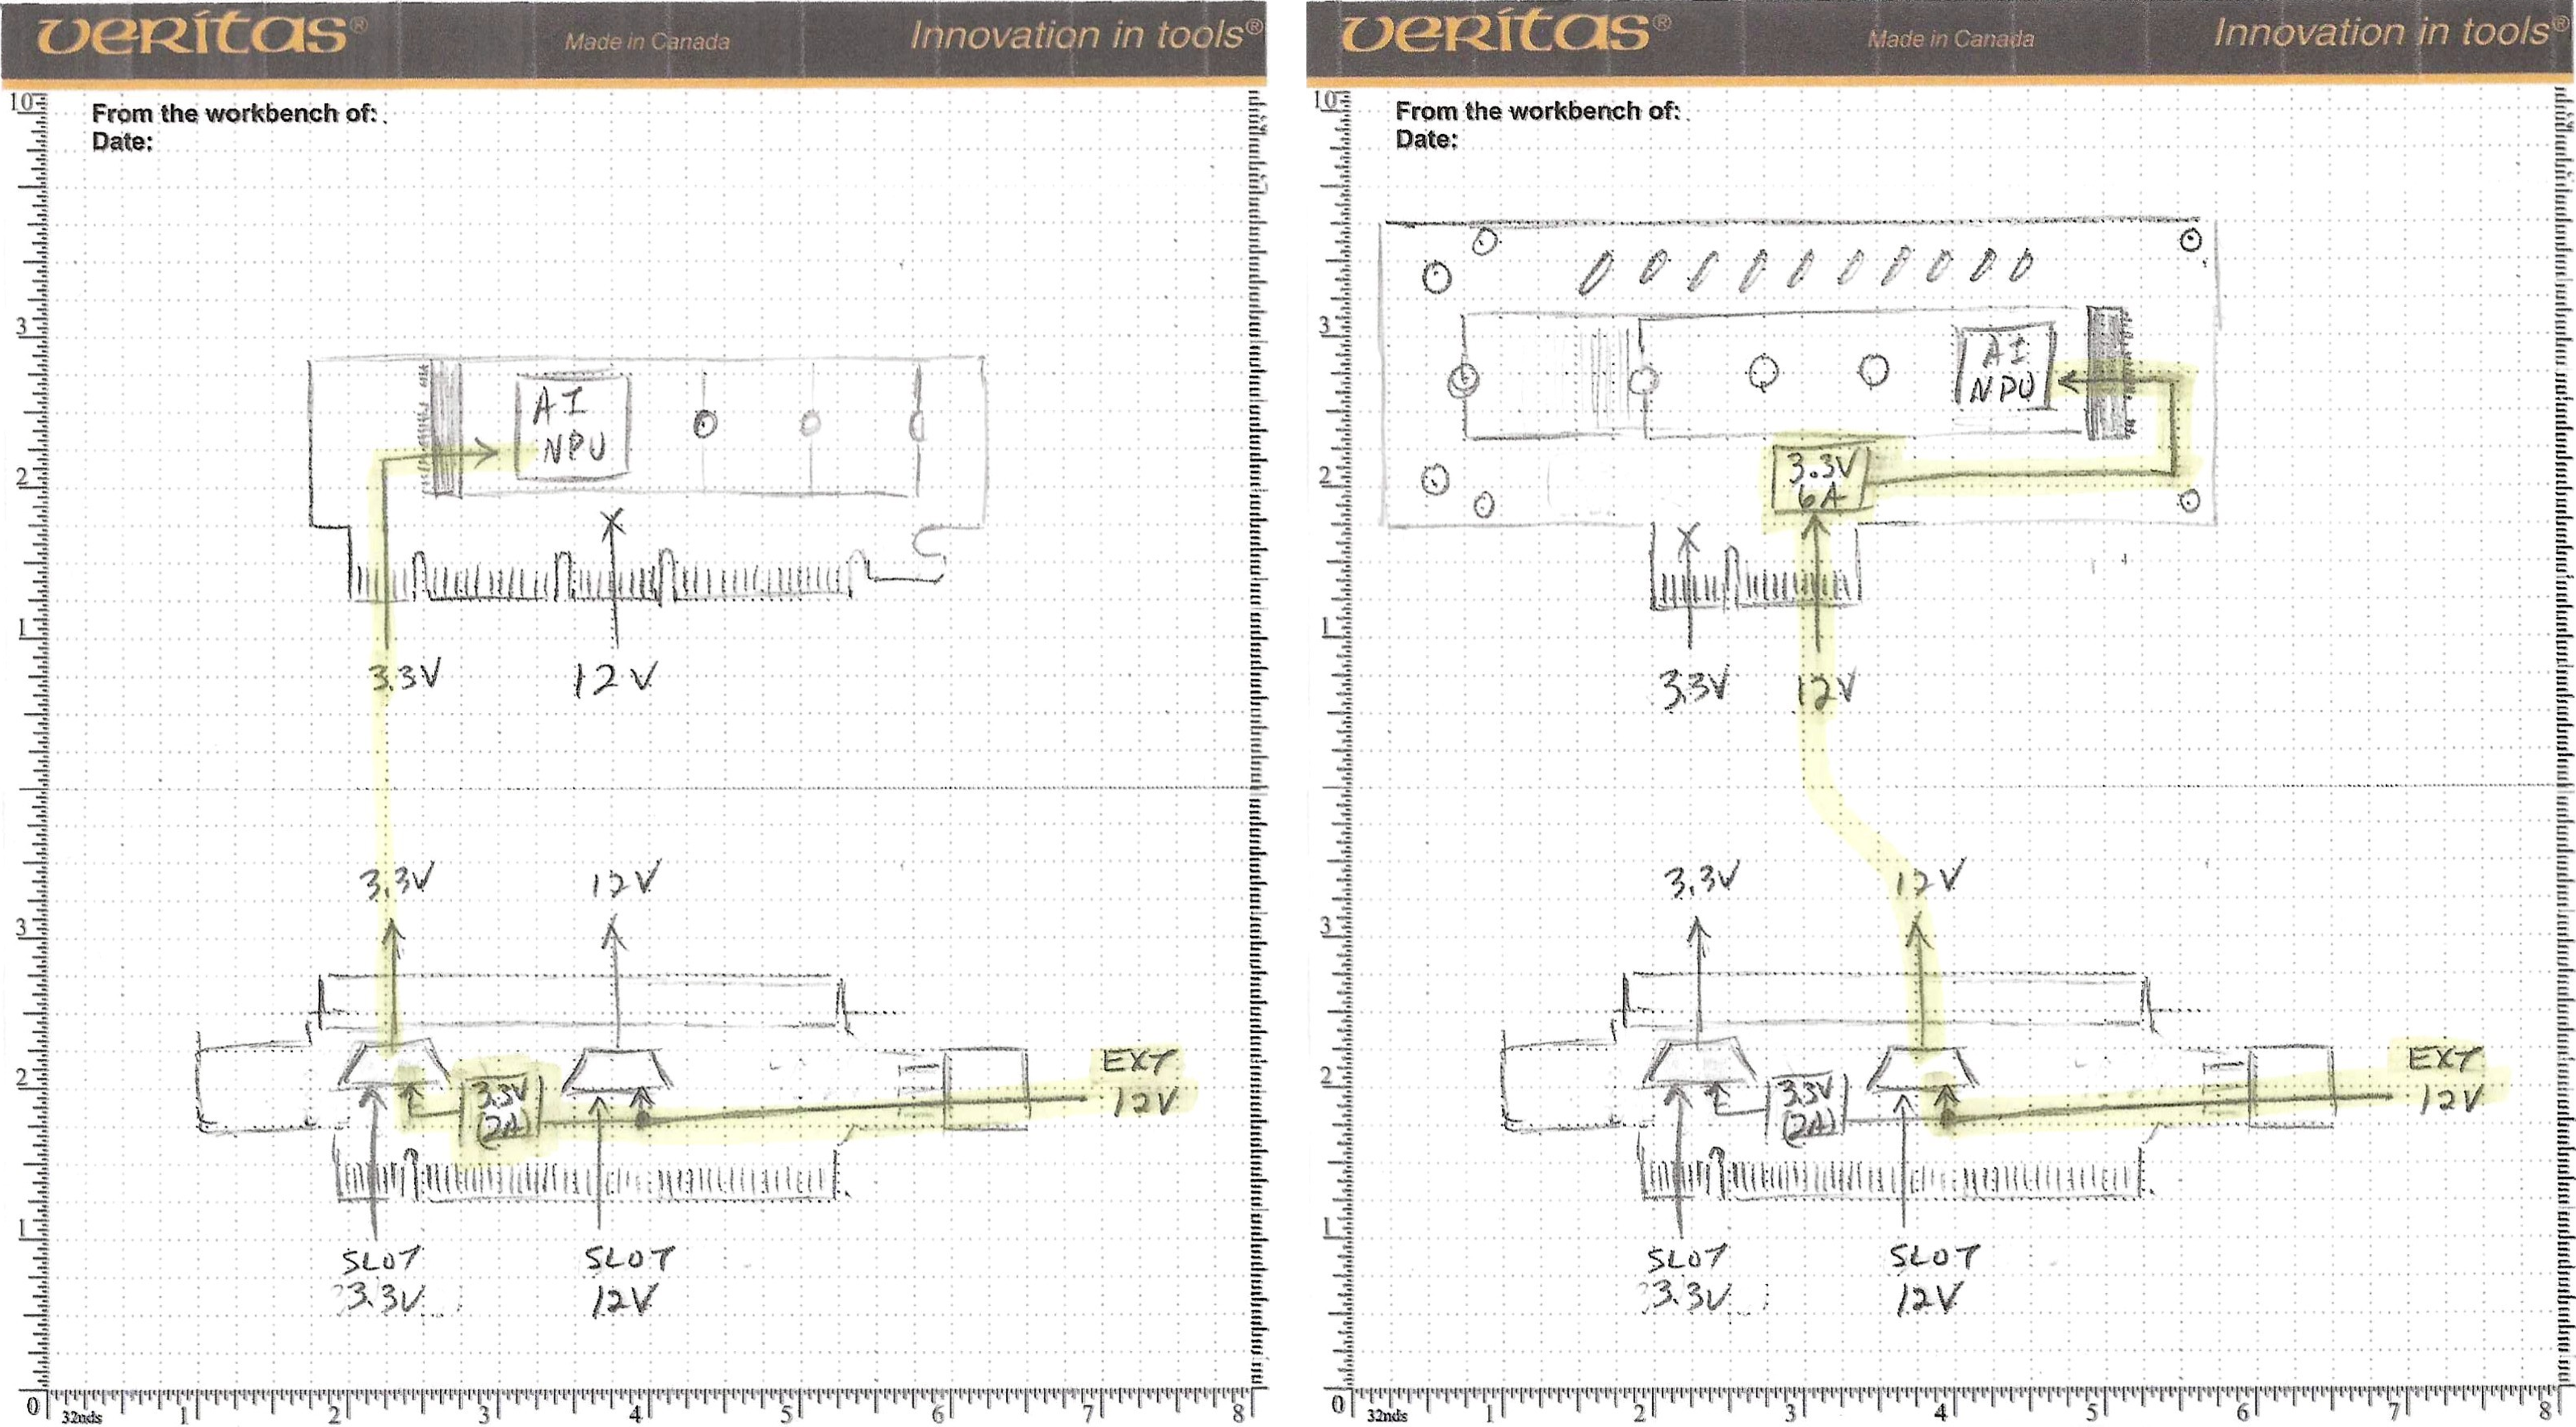
The strategy on the left, uses the ElmorLabs PMD’s on-board 3.3V(2A) regulator to feed the M.2 slot’s 3.3V. This works with the low-power Hailo-8 module, but not with higher-power modules I tested.
The strategy on the right, uses the JEYI’s on-board 3.3V(6A) regulator to feed the M.2 slot’s 3.3V.
In both cases, the power comes from the external 12V supply, originating from the PSU’s PCIE1 cable, and being measured by the PMD2.
Since my goal is to measure the power on several AI accelerators, I chose to go with the PCIe to M.2 adapter with the 3.3V(6A) regulator.
Measuring Hailo-8 Power with mb-powermon.py
The ElmorLabs PMD2 Python API is available on github:
In order to perform our testing, I have added support for the PMD2 probe in my mb-powermon.py utility
The first step is to clone the repo for my open-source power monitoring utility.
(hailo_virtualenv) $ git clone https://github.com/AlbertaBeef/mb-powermon

(hailo_virtualenv) $ cd mb-powermon
Within the hailo docker container, install the “pyserial” python package.
(hailo_virtualenv) $ pip3 install pyserial
Make certain you have permission to access the PMD2 (which will appear as /dev/ttyACM0, when connected to the PC)
$ ls /dev/ttyACM0 -la
**crw-rw----** 1 root dialout 166, 0 May  3 19:30 /dev/ttyACM0

$ sudo chmod 666 /dev/ttyACM0

$ ls /dev/ttyACM0 -la
**crw-rw-rw-** 1 root dialout 166, 0 May  3 19:30 /dev/ttyACM0
Next, we can launch this utility as follows:
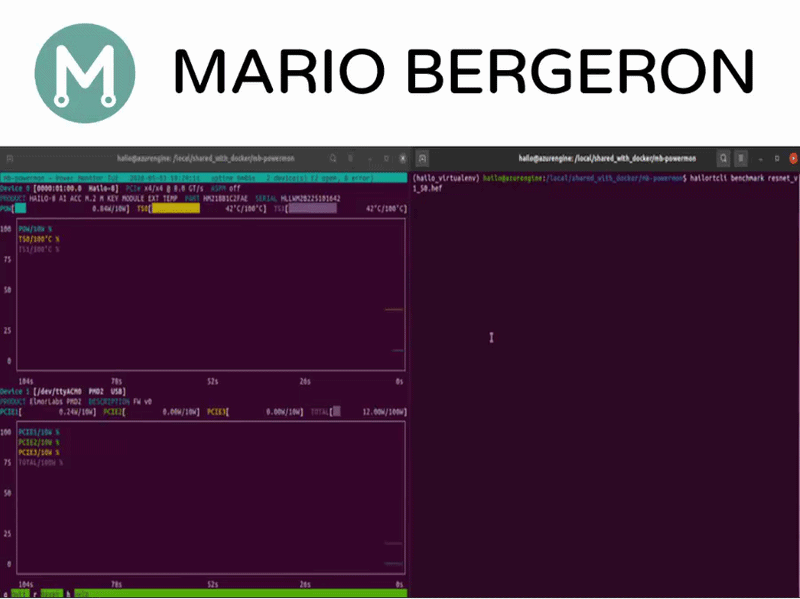
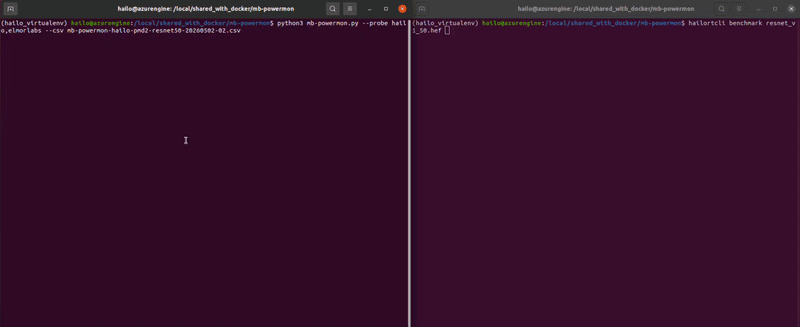
(hailo_virtualenv) $ python3 mb-powermon.py --probe hailo,elmorlabs --csv mb-powermon-hailo-pmd2-resnet50-20260502.csv
If we re-run the hailortcli utility in a separate console within the Hailo docker container:
(hailo_virtualenv) $ hailortcli benchmark resnet_v1_50.hef
Starting Measurements...
Measuring FPS in HW-only mode
Network resnet_v1_50/resnet_v1_50: 100% | 20577 | FPS: 1371.25 | ETA: 00:00:00
Measuring FPS (and Power on supported platforms) in streaming mode
[HailoRT] [warning] Using the overcurrent protection dvm for power measurement will disable the overcurrent protection.
If only taking one measurement, the protection will resume automatically.
If doing continuous measurement, to enable overcurrent protection again you have to stop the power measurement on this dvm.
Network resnet_v1_50/resnet_v1_50: 100% | 20581 | FPS: 1371.53 | ETA: 00:00:00
Measuring HW Latency
Network resnet_v1_50/resnet_v1_50: 100% | 4472 | HW Latency: 3.10 ms | ETA: 00:00:00

=======
Summary
=======
FPS     (hw_only)                 = 1371.27
        (streaming)               = 1371.54
Latency (hw)                      = 3.09513 ms
Device 0000:01:00.0:
  Power in streaming mode (average) = 0 W
                          (max)     = 0 W
(hailo_virtualenv) $ hailortcli benchmark resnet_v1_50.hef
Starting Measurements...
Measuring FPS in HW-only mode
Network resnet_v1_50/resnet_v1_50: 100% | 20577 | FPS: 1371.26 | ETA: 00:00:00
Measuring FPS (and Power on supported platforms) in streaming mode
[HailoRT] [warning] Using the overcurrent protection dvm for power measurement will disable the overcurrent protection.
If only taking one measurement, the protection will resume automatically.
If doing continuous measurement, to enable overcurrent protection again you have to stop the power measurement on this dvm.
Network resnet_v1_50/resnet_v1_50: 100% | 20581 | FPS: 1371.53 | ETA: 00:00:00
Measuring HW Latency
Network resnet_v1_50/resnet_v1_50: 100% | 4445 | HW Latency: 3.10 ms | ETA: 00:00:00

=======
Summary
=======
FPS     (hw_only)                 = 1371.27
        (streaming)               = 1371.54
Latency (hw)                      = 3.09517 ms
Device 0000:01:00.0:
  Power in streaming mode (average) = 4.31512 W
                          (max)     = 4.31512 W
NOTE: You may notice that hailortcli is reporting zero or identical average and max values (e.g., 0W, 4.31512 == 4.31512). As explained in Part 1, this is a signature of total or partial contention when two applications read the Hailo power API simultaneously — which is exactly what’s happening here, since mb-powermon.py is also polling the API for comparison. I recommended against this in Part 1, and I’m doing it deliberately here only to overlay both measurements on the same plot. The Hailo values shown should be treated as approximate references, not ground truth. For a clean Hailo reading, run hailortcli alone, as in Part 1.
While this is running, you will see something similar to the following (video playing at 10x speed):
In this video, I am benchmarking resnet50 twice on the same Hailo module.
If we convert the output .csv file to a user friendly .html, we can plot power and temperature for both runs and overlay Hailo’s reported averages:
(hailo_virtualenv) $ python3 csv-to-html-plot.py --input mb-powermon-hailo-pmd2-resnet50-20260504.csv --output mb-powermon-hailo-pmd2-resnet50-20260504.html
The first thing that jumps out with these results are that the PMD2 measurements are significantly smaller than the Hailo’s own measurements, especially the lower values (idle power).
The PMD2 system was designed to measure much higher power values. A PCIe cable typically can handle up to 27 A continuous on the 12V rail (~324 W per channel). In comparison, Hailo’s power range is only 4W (~1% of PMD2’s range). This is likely at or below the ADC’s noise floor, where we are hitting quantization steps.
Conclusion
In this article, we have implemented an independent power measurement strategy that can be used with any vendor’s M.2 AI acceleration module. It also works with these vendor’s PCIe accelerator cards, however, I do not have any in my possession.
This strategy is fairly involved, and requires a standard ATX power supply, which is not always available, especially for the more compact mini-PCs and NUCs that have become very popular.
Additionally, we have observed that the range of values we are measuring are too small for the PMD2, which was designed to measure much higher power consumption. The PMD2’s PCIE(12) V channels go up to ~324 W, whereas our measurement range is ~4 W, so we’re effectively operating at ~1% of PMD2’s full scale. This is likely at or below the ADC’s noise floor, where we are hitting quantization steps.
In the next article, I will implement a simpler strategy using the Adafruit INA based power measurement boards.